


It’s almost May! Time to trade in gloomy weather for the sweet sunshine to come! Today, we get to celebrate the changing months and seasons with an “April showers bring May flowers” craft! At Buckle, this is one of our favorite sayings, and not just because of its literal meaning! Of course, we all know that you need to water flowers to get them to grow, but this saying means something else, too. It also means that rainy and gloomy days will pass, and that even if you have a bad day, a good day soon will come. So… let’s celebrate that!
This craft would be great for someone 5 years old & up with adult supervision (no worries if you have a younger crafter – just modify the instructions to fit). You’ll have so much fun making these DIY flowers to celebrate the changing season and ALL the good days to come. Have a blast creating your very own 3D paper flowers!

What You’ll Need:
- Construction paper – pick your favorite colors!
- Scissors
- Glue
(Hot glue makes for a quick project, if you have time for drying– regular glue works too!) - Crayons / Colored Pencils / Markers
- Green Straws or Popsicle Sticks
STEP 1: CUT YOUR PAPER
You’ll want to start by grabbing three pieces of paper. We suggest bright, spring colors matching the May vibe!
This paper is for making our flower petals! Since flowers have different size petals, we will have to cut the paper into different sizes.
- With your first piece, cut it in half, right down the middle (hamburger style).
- Your second piece of paper can be cut into 4 even pieces.
- The third piece can be cut into 8.
Don’t worry if your cuts aren’t perfect! The goal is to have different sizes because every flower is unique.

STEP 2: FOLD IT UP
It takes three, easy folds to make the flower petals.
- Start by making a diagonal fold down the paper.
Bring the top left corner down to the bottom of the right side. - Make another diagonal fold to make a house shape.
Bring the top right corner down to the bottom of the left side. - Then, fold your house shape directly in half!
Make your final fold vertically, right down the center.


STEP 3: CUT YOUR PETALS
Draw a line for how round you want your petals to be! Flatter petals look a little more realistic, but rounder petals give a very cute, cartoony look to your flowers. Cut along your line and unfold your petals!
Then, just cut one of your petals off the flower (to make it easier to glue later, you can always leave a little bit of paper to overlap where the petal used to be).
It’s okay if you mess up, that’s what the extra pieces are for!


STEP 4: DECORATE YOUR FLOWERS
This is where you get to be creative!
it’s time to decorate. Grab your crayons or colored pencils to add a personal touch.
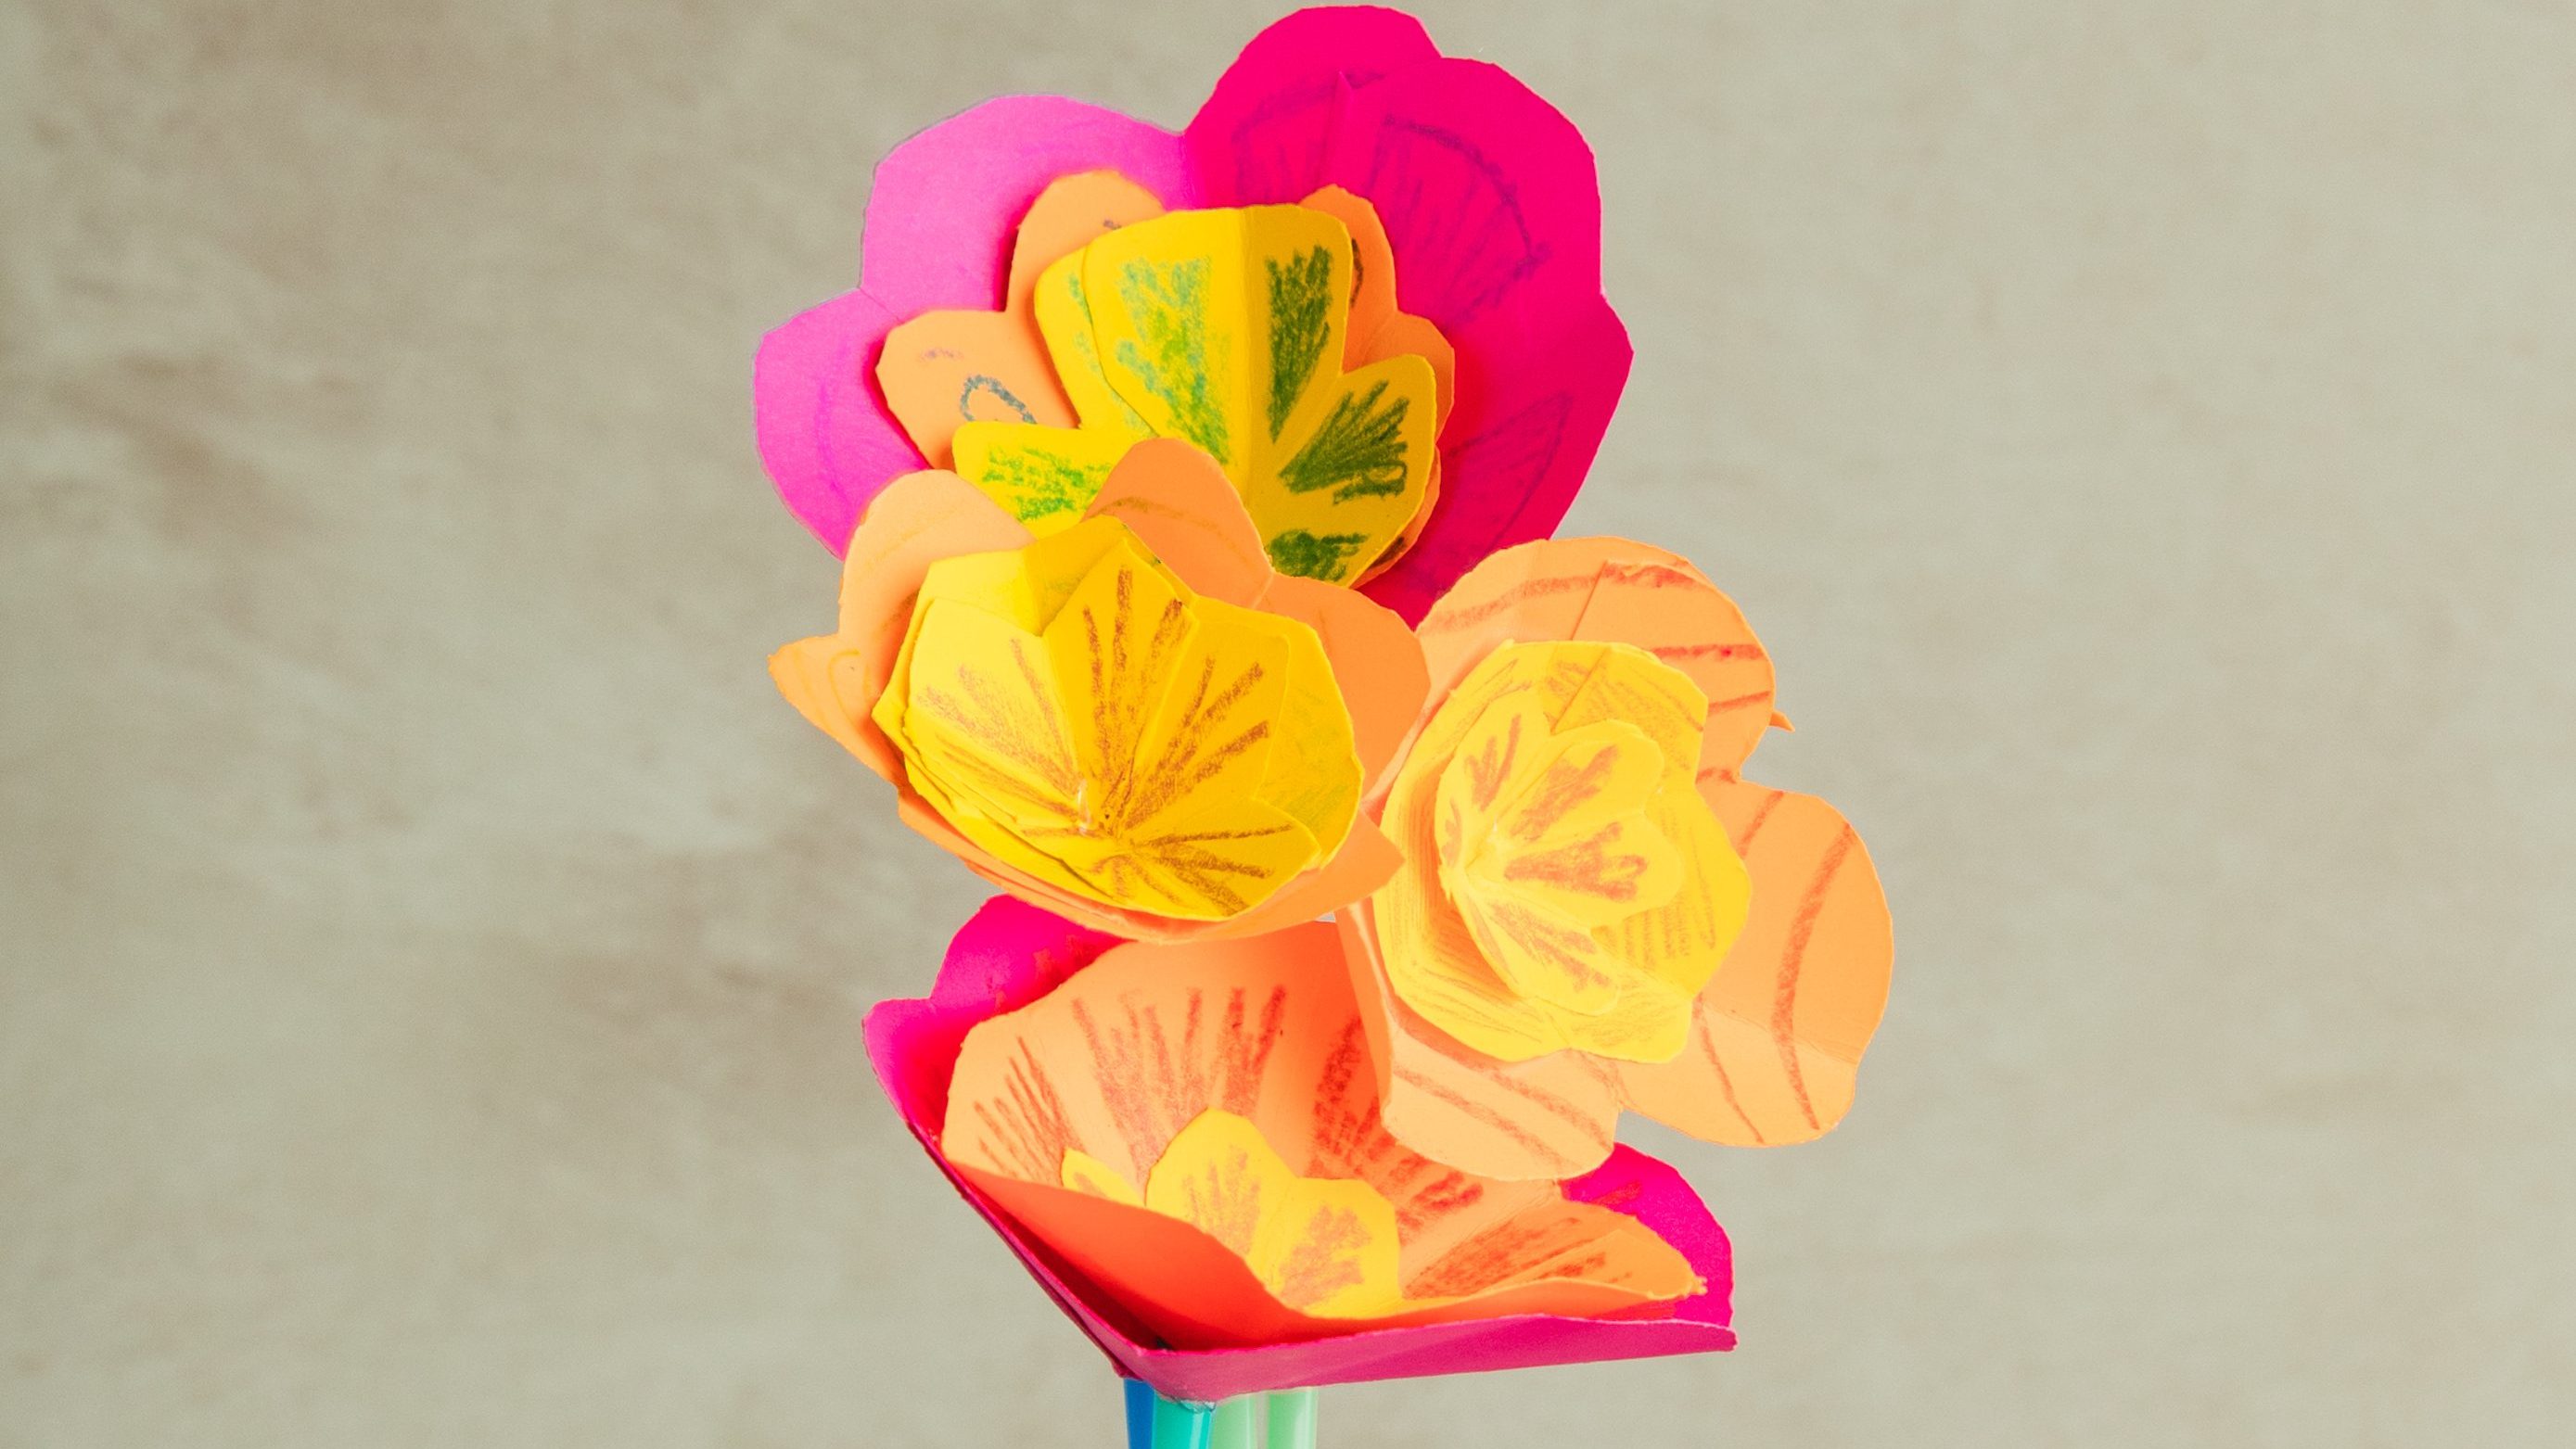
Be sure to repeat steps 1, 2, 3, and 4 as many times as you want (depending on how many flowers you want) with different sizes of paper to make different sizes of petals. For our flowers, we made our biggest petals out of 1/2 of a sheet of paper, the medium size petals out of 1/4 of a sheet of paper, and our smallest petals out of 1/8 of a sheet of paper.


STEP 5: ASSEMBLE YOUR FLOWER
Remember how you cut off one petal? Overlap the paper where that missing petal was and glue the sides together. This will bring your craft to life creating a 3-D flower!
Next, you’ll want to layer your petals together to make the whole flower. Putting the biggest petals down first, you’ll want to layer the smaller ones on top with the littlest one in the middle of your flower.
When you get it exactly how you want it, make sure to add a small drop of glue between your layers to make them stick snugly together.
Finally, make a small cut in the back of your flower (big enough for your straw or popsicle stick to slide into). Add a small drop of glue in the cut you made, and attach your green straw or popsicle stick to the back of your beautiful flower!
BONUS STEP: SHARE SOME SMILES
You can always keep your crafts for yourself, but sometimes it feels just as good to share them with someone you love. Maybe you could give this flower as a gift to your parent, teacher, neighbor, or friend! It would definitely make someone you love smile, and it would remind them that good days are yet to come!
And OF COURSE, share your craft with us! Tag @BuckleYouth on Instagram to show off your beautiful bouquet!


